


Monday, March 26, 2012

Friday, March 23, 2012
Lemon Cake
In my early twenties I was working a second job doing inventory at a local grocery store. I was assigned to inventory the baking isle and discovered ready made pie filling. Yeah! Up until that moment I had no idea. The lemon really stuck in my mind because when I was a child my mom used to buy the lemon Bundt cake mix, it had a wonderful lemon filling. Back then there where several flavors of Bundt cake mixes, all with fill -ng that baked in the center - delicious!
Back to my early twenties-
For a food day at work (my daytime job) - short on time because of my second job, I decided to try this out. It was a success and is still one of my most requested recipes.
Ingredients:
1 Lemon cake mix + ingredients to prepare cake (I buy whatever brand is on sale)
1 can Wilderness Lemon Pie Filling
1 8 oz Cool whip, thawed
 |
| bake cake as directed for 2 - 9" pans (a 9" x 13" pan also works). Cool completely. |
 |
| Place first layer on serving dish. |
 |
| Spread half of lemon pie filling on top. |
 |
| Top with remaining cake layer and remaining pie filling. |
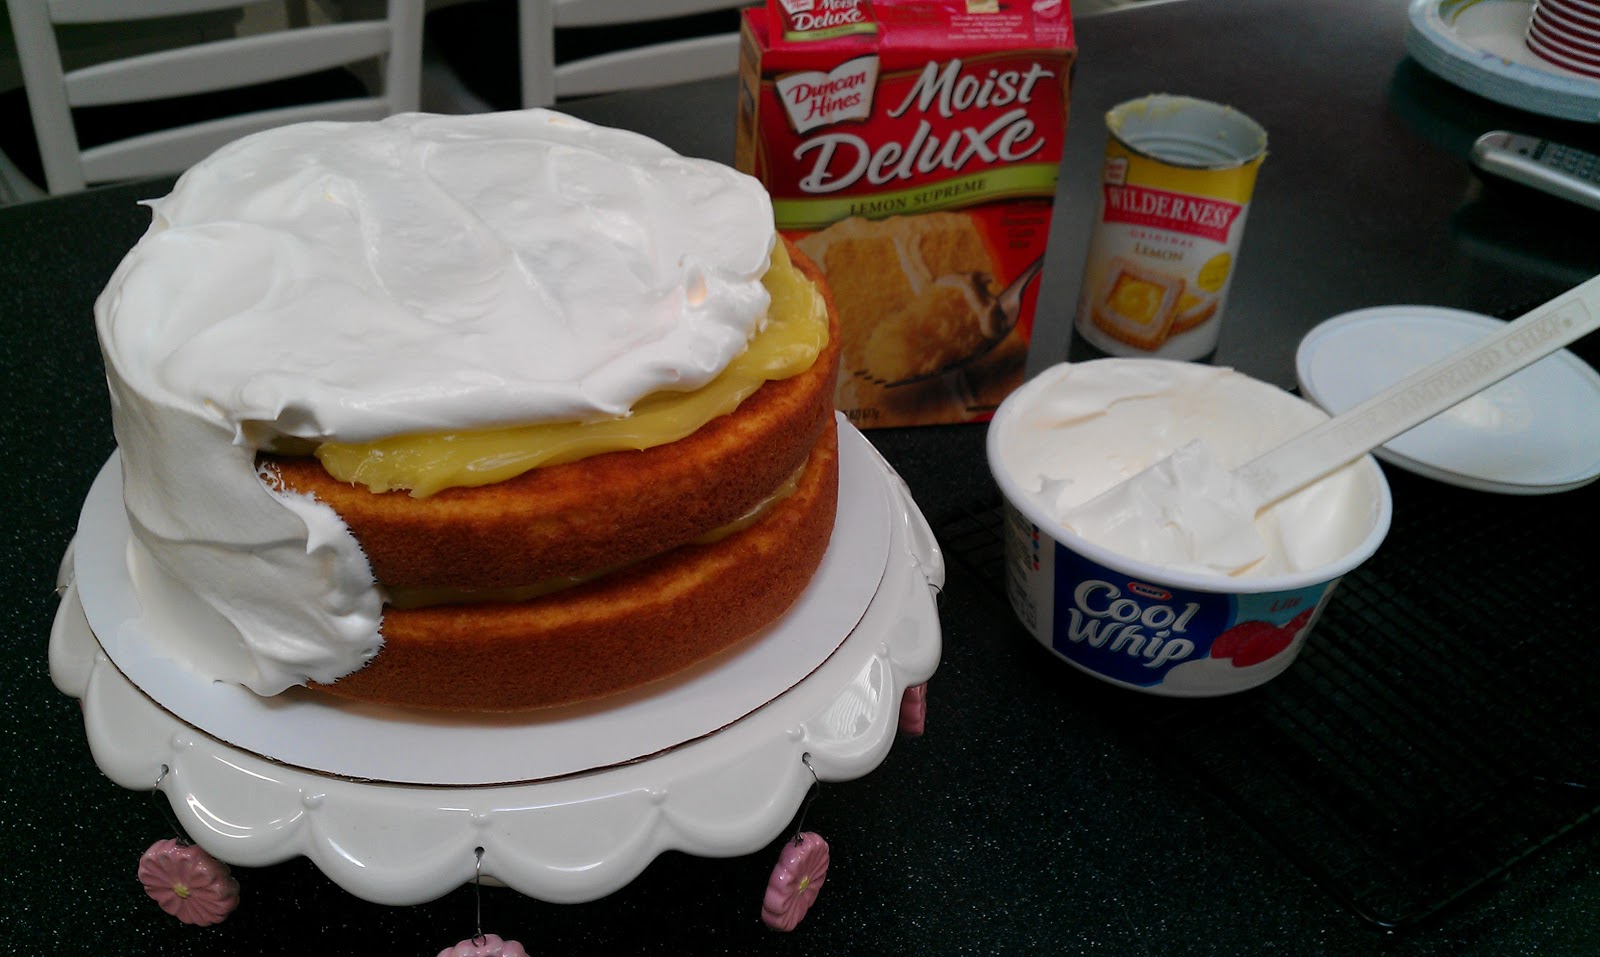 |
| Stir thawed Cool Whip and spread over entire cake starting on the top. |
 |
| Chill before serving. |
 |
| Serve chilled. This cake is light, moist and EASY. Great for Spring and Summer. If you use a 9" x 13" pan spread the pie filling on top, then the Cool Whip. Thanks for stopping by! Holly |
Thursday, March 22, 2012


Monday, March 19, 2012

Paper Flowers Favors
I made these cute flower favors for my March Card Club!
 |
| Here's how... |
 |
| Start with a 6"x 6" double sided piece of designer paper and score at 2" and 4". Turn 1/4 turn and score again at 2" and 4". |
 |
| Score the outside corner squares diagonally. |
 |
| Fold inward on all score lines except on the diagonal lines fold backwards. It will look something like this. |
 |
| Folding on the diagonal corners, punch a hole through both layers of each corner. |
 |
| .I will look like this. |
 |
| Thread bakers twine through holes ... |
 |
| pulling tight, tie a knot. This will ensure your flower pick will be held up write. |
 |
| I used a die for my flowers, a flower punch would also work. Use a bone folder and your thumb to curl the petals of the flowers. |
 |
 |
| Using dimensional adhesive dots attach flowers back to back onto skewers off setting the petals. |
 |
| Continue layering with dimensionals - the flower centers and buttons on both sides. Tie a bow with baker's twine and attach to button with a glue dot - this will look like you threaded the button without all the work. |
 |
| Tie green ribbon on the skewer for leaves, place the skewer in your paper basket and fill with candy. Wouldn't these be great favors for a girls birthday party? The skewers can also be used as cupcake flags or a cake toppers. |
 |
| They also make a great centerpiece. |
The following supplies were used for this Tutorial, The numbered items can be purchased at my Stampin' Up! website www.hollys_hobbies.stampinup.net
117158 Designer Series Paper Stack - In Color Assortment 2010-2011
113439 Big Shot Die-Cutting Machine
118871 Bigz Die - Island Floral
122334 Simply Scored Scoring Tool
125586 Simply Scored Diagonal Plate
Card Stock - Poppy Parade 119793, Regal Rose 105130, Daffodil Delight 119683, Peach Parfait 119673 and Pretty in Pink 100459
119743 Designer Buttons - Neutrals
124262 Baker's Twine - White
117288 Satin Ribbon 5/8" - Certainly Celery
102300 Bone Folder
104430 Stampin' Dimensionals
103683 Glue Dots
Bamboo Skewers
Paper Shreds
Thanks for stopping by!
Holly
Friday, March 16, 2012
Stampin' Up! February Workshop projects
 |
| Today I am sharing the Stampin' Up! workshop projects I created for February Workshops. Keeping all with a Birthday theme using the Stampin' Up! Sweet Shop Product Suite from the Occasions Mini Catalog I created the following: |
 |
| I used the Simple Letters Alphabet Bigz Die (115960), the new Designer Rosette die (125594), the Big Shot Die Cutting Machine (113439), Sweet Shop Designer Series Paper (125408) and the Jelly Bean Brads (125587) to create this simple scrapbook page. |
 |
| This Centerpiece is so easy and makes a big statement. With the Simply Scored Scoring Tool (122334), the Sweet Shop Designer Series Paper (125408), Island Indigo ruffled ribbon (122974), Party This Way Stamp Set (118744), Jelly Bean Brads (125587), Some dowels and a inexpensive vase purchased at a craft store and voila! |
 |
| Simple Make-n-Take card using Soft Suede Card Stock (115318), Sweet Shop Designer Series Paper (125408), Soft Suede Classic Ink Pad (115657), Island Indigo Classic Ink Pad (122937), Linen Thread (104199) and In Color Designer Brads (122940). |
 |
| I made this cute Hostess gift reusing an empty brad packaging. I filled it with assorted brads, buttons and ribbon for my Hostess. When these items are gone she can use it for paperclips etc. All of the numbered items can be purchased on line at my Stampin' Up! website www.hollys_hobbies.stampinup.net Thanks for Stopping by! Holly |
Subscribe to:
Posts (Atom)
