Showing posts with label DIY. Show all posts

Friday, June 28, 2013

An Old Dresser Gets a Makeover

I haven't posted in a while - I have been so caught up in life now that summer is here it seems there is something going on everyday, when I do get free time I spend it painting walls. Even though I just painted the inside of the house in March of 2012 here I am painting again. Its all about color -
A girl can change her mind - right?

Any who - more about that later. On Wednesday while the handyman built new railing for the new stairs I went to work painting one of the dressers for my bedroom makeover.

I used Sherwin Williams All Surface paint in Black.

 
Here is the before.


First I disassembled the dresser and placed it on blocks.


I then used a sanding block to lightly sand the surface.
 
 
Then went over it with a damp towel to remove the dust.
 
 
Then, using an angled brush I painted the raised trim and with a foam roller (mine is approx. 8" long) I rolled the flat surfaces painting light coats. I painted three to four coats total lightly brushing on the last coat, letting it dry in between.


For the knobs I punched holes in a piece of firm cardboard with a crop-0-dile to hold them, then painted using a brush.
 
 
Finally assembling the dresser - It turned out great! The bed (I painted before we moved it back into the house) and the small dresser done - The large dresser and two nightstands to go before the big reveal.


Thanks for stopping by! Comments and questions welcome.
 

Holly


Wednesday, May 22, 2013

Decorative Wine Boxes

I recently picked up these paper mache wine boxes on a whim at Hobby Lobby. I was not sure how I would decorate them. I was thinking what great gifts these would make for Christmas and/or New Years with a bottle of wine or champagne. It's never to early to think about the holidays and avoid the stress later.

When I sat down to decorate them. I remembered I had this big roll of paintable embossed wall paper I had picked up at Home depot years ago for another project -
it was perfect for the look I was going for.
 
I measured out my boxes and cut my paper pieces a couple of times (I forgot to - measured twice cut once). Good thing I have a big roll of this paper.
 
Next I watered down some Tacky glue I had on hand so that I could brush it on quickly and easily attach the paper. Working one piece at a time until the entire boxes were covered. Then I let dry completely before sanding the edges smooth.
 
Here is what they looked like before painting them.
 
 
I mixed acrylic paint that I had to get my desired color and tested it out on some scraps of the embossed paper before painting the boxes.
 
Once that paint was dry I antiqued this one by rubbing watered down
brown paint over it with a wet towel.

Then I rubbed a lighter color of paint over the high parts to highlight it
using a dry towel and very little paint followed by a spray of Matt clear coat. 
 
For this red one I used a black gel stain to antique it which gives it a satin finish and eliminates the need for a clear protective coat.
 
Then for the focal points - I went to work with paper and ink to create a label and tag to adorn them.

A trip to JoAnn's to find cording to replace the paper handles and voila! They are ready for gifting.


Supplies used:

For the label:

Papaya Collage Stamp Set #126612 (clear) #126610 (wood)
Established Elegance Stamp Set #122530 (clear) #122532 (wood)
StazOn Ink pad - Jet Black #101406
Sahara Sand Stamp Pad #126976
Watercolor  paper #122959
Basic Black Card Stock #121045
Bravo Burgundy Stampin' Write Marker #119701 (Regal collection)
Soft Suede Stampin' Write Marker #119703 (Neutral collection)
Crumb Cake Stampin' Write Marker #120967
Color Spritzer Tool #107066
Stampin' Sponge #101610
Dazzling Details - Silver Sparkle #127845
Stampin' Dimensionals #104430
Rhinestone Basic Jewels #119246

For the tag:

Artistic Etchings Stamp Set #120573 (clear) #118517 (wood)
Layered Labels Set #127072 (clear) #127070 (wood)
Watercolor Paper #122959
Basic Gray Card Stock #121044
StazOn Ink pad - Jet Black #101406
More Mustard Stamp Pad #126964
Early Espresso Stamp Pad #126974
Stampin' Sponge #101610
Stampin' Dimensionals #104430
Stampin' Dazzle Marker - Silver #128978
Dazzling Details - Silver Sparkle #127845
Framelits Dies - Ovals Collection #129381
Framelits Dies - Apothecary Accents #127003
Big Shot - Die Cutting Machine #113439


The numbered Stampin' Up! items above can be purchased here.


Thanks for stopping by! Comments and questions welcome.


Holly
 

Sneak peek at the new floor

I have been painting a little here and there when I have time while my DH has been installing the new baseboards. It's slow going with everything else that comes up but we are slowly chipping away at it. None of the rooms are completely done at this point so I thought I could at least show a sneek peek.

 
Before -
 
Carpet in the dining room and old baseboards. You can see a little bit of the old tile in the upper left corner.
 
Tile removal - This was not fun.

 
My favorite part of the tile removal was when it was done.
 
New floor, baseboards and paint - the baseboards still need touch up paint.
 
 
 We are so loving this floor.
 
Thanks for stopping by. Comments and questions welome.
 
Holly


Sunday, April 28, 2013

Halfway Through the Remodel

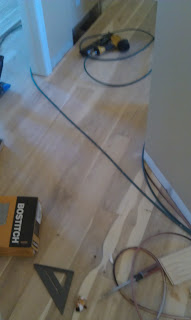
Last I posted on this was Thursday morning. Just a couple hours later the installer's showed up to start installing the new floors. We had been preparing for what seems like months and were still caught off guard.
 
The office and guest room still had carpet pad and tack strip, the master bedroom and walk in closet still had carpet and the inflatable bed our neighbors had lent us and there were still a few boxes and odds and ends that needed to be moved out.
 
I called my DH at work to come home. luckily he works 5 minutes away. We donned safety glasses and knee pads and got to work. Once we had the office and guest room cleared so they could start installing the floors Waste management showed up to pick up the Bagster's we had filled with carpet, tile and baseboards - then it was back to work. When the installer's left for the day my DH worked on the stairs and moved the air intake for the furnace that used to be on the side of the stair landing that he removed earlier. I took my babies - Bob, Lucy and Claire to the basement and groomed them so they would be nice and clean while staying with family.
 
We finally called it quits at 7:30 loaded the pups and what we could think of to grab and left.
 
That day by far was the most physically challenging.
 
Since then we have stopped by to grab odds and ends we'll need for the next week or so and of course check on the status.


While my hubby was at work last Monday I removed of the tile in the pantry.
 When he came home he was so happy he removed the tile from the stove and dishwasher areas. And that was the end of the tile removal (Whew! that was a rough job).

 The guest room - The beginning of the new floors.
Bob was trying anything to get upstairs to be with us.
He eventually got upstairs and we had to move this box to avoid future break outs.
 
Progress : )
 Bob had to check it out.
 The final layout of the new steps which extend 4" on each side to accommodate the new railing.
A few more pics - I took lots of them.


These are the stairs going into the family room
 
 The trim along the wall which will have a railing on top and trim underneath.


The installers plan to start the staining process on Monday.
 
Yesterday I met a good friend at the Gateway shopping center in Salt Lake City to do some catching up, shopping and have lunch. We had a great time, the weather and tulips where gorgeous.


 Today the hubby and I are going to shop for new baseboards and stop by the house to check on the progress. And maybe even catch a movie.

Have a great day!

Thanks for stopping by. Comments and questions welcome.

Holly


Related Posts Plugin for WordPress, Blogger...