Monday, April 30, 2012
Shopping Bag to Gift Bag
I love the whole re-use, re-purpose idea. Not only because I am a crafter who doesn't mind saving some cash. I don't like to spend money on gift packaging either.
To make this cute gift bag I re-used a shopping bag from one of my favorite local kitchen stores. It happens to be a great shade of green but even the brown bags work great for this.
To make this cute gift bag I re-used a shopping bag from one of my favorite local kitchen stores. It happens to be a great shade of green but even the brown bags work great for this.
I used some Stampin' Up! scrapbook paper, stickers, ribbon and adhesive - So easy!
You can be creative - Just make sure to cover the writing and pictures on the bag on both sides.
I used talcum powder on the back of the stickers so I could pop them up with some dimensionals.
Supplies used:
*Nursery Nest Designer Series Paper #122347
*Nursery Nest Quick Accents #122370
*1-1/4" Striped Grosgrain Ribbon - Marina Mist #119772
*1-1/4" Striped Grosgrain Ribbon - Wild Wasabi #125059
1/8" Taffeta Ribbon - Marina Mist #119257
3/8" Ruffled Ribbon - Lucky Limeade #122977
Stampin' Dimensionals #104430
Shopping bag
Talcum powder
*These items are being retired and are only available while supplies last.
To purchase these and other Stampin' Up! products
Thanks for stopping by
Holly
Thursday, April 26, 2012
2012 Stampin' Up! retiring lists
The 2012 retirement lists of Stampin' Up! stamps and accessories are out. These items will be available ONLY until supplies last or May 31, 2012 which ever comes 1st.
For the retiring accessory list click
For the retiring stamps list click
Don't wait!
Shop Now
Wednesday, April 25, 2012
Tulips
I just have to share - My tulips are gorgeous this year! I wish they would last longer.
And Bob got a much needed haircut today.
Now back to finishing those basket liners - I only have 3 left to make.
Thanks for stopping by!
Holly
Tuesday, April 24, 2012
Garden Planting
My DH wanted to take a trip to the local IFA for some fertilizer on Friday and asked if I wanted to tag along - Of course! I said - I need some nutri-mulch for the garden.
When we got there I was side tracked by the vegetables. I hadn't planned to purchase any vegetables just yet but they all looked so healthy and green. The tomato plants even have a couple of tomatoes on them.
Today was the first chance I've had to work in the garden since, and my DH who happened to take the week off work helped - Yes! he pulled all the grass from the fence line while I planted and spread the mulch - And this after he took me and the pack (Bob, Lucy and baby Claire) for a walk in the park then off to Einsteins for breakfast bagels. Love you honey!
A couple hours later and about all we have to do now is sit back and watch it grow.
Looking forward to the harvest and all the Summer fun in the meantine.
Here is what I planted:
Tomatoes: Early Girl and Celebrity
Lemon Cucumbers
Bell Peppers - Orange and Green
Parsley
Dill
Corn - Jackpot Hybrid and Peaches and Cream
Peas - Alaska Wilt Resistant
White Onions
Radishes
Asparagus - M. Washington
Green Onions
Carrots - Nanten Coreless
Horseradish
Chives
When we got there I was side tracked by the vegetables. I hadn't planned to purchase any vegetables just yet but they all looked so healthy and green. The tomato plants even have a couple of tomatoes on them.
Here is my haul..
And didn't forget the nutri-mulch. This is good - Thats what I went for.
He got his fertilizer - Even better! He is more forgetful than I am.
Today was the first chance I've had to work in the garden since, and my DH who happened to take the week off work helped - Yes! he pulled all the grass from the fence line while I planted and spread the mulch - And this after he took me and the pack (Bob, Lucy and baby Claire) for a walk in the park then off to Einsteins for breakfast bagels. Love you honey!
A couple hours later and about all we have to do now is sit back and watch it grow.
And here is Bob, one of my pack members enjoying the shade.
Looking forward to the harvest and all the Summer fun in the meantine.
Here is what I planted:
Tomatoes: Early Girl and Celebrity
Lemon Cucumbers
Bell Peppers - Orange and Green
Parsley
Dill
Corn - Jackpot Hybrid and Peaches and Cream
Peas - Alaska Wilt Resistant
White Onions
Radishes
Asparagus - M. Washington
Green Onions
Carrots - Nanten Coreless
Horseradish
Chives
Thanks for stopping by my garden!
Holly
Monday, April 23, 2012
Sunday, April 22, 2012
Basket Liners with Covers
I purchased these baskets a couple of years ago to organize my crafting supplies and utilize the space above the shelving in my office. I wish they had come with liners and covers, especially covers to keep the dust out.
I decided to use some of those craft supplies and make my own basket liners.
This is the end result - with a hook and loop closure to easily access my supplies - Love it!
These are the supplies I used:
Fabric
Square basket
Square basket
Coordinating thread
Sew on Hook and loop
1/2" Elastic
Sewing machine
Ruler
Scissors
pins
Roller Cutter
Cutting Mat
Roller Cutter Guide Ruler
Iron and Ironing board
I measured the basket to get the dimensions.
I drew out a diagram for easy reference
For the main piece I added down one side across the bottom and up the other side + 3" to each side for the overhang - 8"+11"+8"+6" = 33". Then added 15"(the depth of basket) +2" (to allow for seams) =17". So the main piece I cut was 33"x17".For the ends of the box I added 8" (the height of the box) +3" (for the overhang) = 11". And the width 11"+2"(to allow for seams)=13". And cut 2 (one for the front and back) of size 11"x 13".
To assemble I matched fabric face to face and pinned - The front side of both main piece and one end piece.
Sew, then match the bottom of this same end piece to the bottom of the main piece, pin and sew.
Continue with the other side of this same end piece and sew up the other side.
It is now starting to look more like a box - this is a good thing (it is supposed to).
Continue onto the other end, piecing it together in the same way.
Check to make sure it fits the basket.
Whoohoo! it fits!!
Next, I took the liner out and folded the overhang under 1/2" and sewed around the edge.
I cut 3" pieces of elastic and sewed them to the underside of the corners to make the liner fit snugly.
Pulling as I sewed to create a little bit of a gather.
The liner is done.
Now for the cover...
And cut this piece 17"x16"
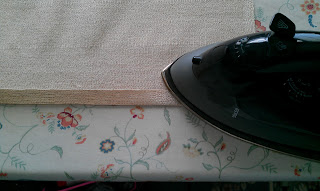
Folding and ironing the sides, fold twice at 1/2".
Pin and sew.
Continue with the other sides.
Make sure it fits. I will hang over the sides to allow for the hook and loop.
Cut the hook and loop to the length of the basket, pin and sew one side (hook or loop) onto the underside of the cover on both sides.Sewing across a couple of times to make sure it is secure.
While the liner is in the basket, I pinned the other sides of the hook and loop to liner for placement.
Then sewed it on completing my first basket liner with cover.

I added a label and Voila!
One down, five to go!
I hope this all makes sense and inspires you to tackle your own project.
Thanks for stopping by, I'd love to hear from you!
Holly
Tuesday, April 17, 2012
Getting the garden ready
Spring is finally here - Warm days, sunshine (at least in between the rain storms). Last week I had a little time on my hands and it just so happened to be while the sun was shining.. So, I went out and tackled the garden. I've been gardening for several years now and really enjoy it. The planting and harvesting are great, but the cleanup and preparations are not my fav. This is what I started with.
And this is how far I got. Pretty good for a couple hours of work.
I still need to pull the grass from the fence line but I did get almost half of the garden planted. I used an idea I found on Pinterest using the seed packets as markers and covering them with mason jars. I use some extra long garden staples to hold them off the ground. And - Yes! They passed the rain test - I love this idea and I can see exactly what I have planted and where.
Thanks Pinterest and the person who thought up this idea!!
I'll be getting back to the garden later.
Thanks for stopping by
Holly
Monday, April 16, 2012
Mini Paper Daffodils
I made these a couple of weeks ago and planned to post them before Easter but the time flew by and that didn't happen. At least it is still daffodil season right?!
 |
| Supplies - A complete list will follow |
 |
| Using the medium flower on the punch, punch your first daffodil layer |
 |
| Punch 1/2" circles and cut into a spiral from the to the center |
 | ||
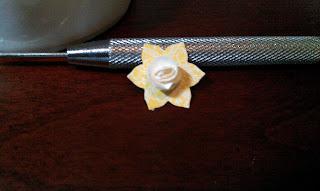
| Starting from the outside curl the paper around a paper piercing tool
Add a glue dot to the inside flap (center) to hold it all together 
Add a glue dot to the center of the first daffodil
layer and place this rosette in the center
For the stems I colored a piece of hemp twine by running it between a stamp pad and a sponge then snipped it into 2" lengths Using a piece of linen thread, I tied the stems together Then, with a glue dot and some dimensionals I attached my mini bouquet to my card Here is the first ones I made, framed for Easter To make this mini bouquet you will need the following supplies: Designer Series Paper - Attic Boutique #125407 Very Vanilla Card Stock #101650 Baja Breeze Card Stock #111352 Lucky Limeade Classic Stampin' Pad #122935 Baja Breeze Classic Stampin' Pad #111833 Teeny Tiny Wishes Stamp Set #115370 Hemp Twine #100982 Linen Thread #104199 Boho Blossoms Punch #119858 1/2" Circle Punch #119869 Scallop Trim Border Punch #118402 Mini Glue Dots #103683 Stampin' Dimensionals #104430 Click here to purchase these and other Stampin' Up! products Thanks for stopping by! I'd love to hear from you. Holly |
Subscribe to:
Comments (Atom)


.jpg)
.jpg)
.jpg)

.jpg)
.jpg)


