Tuesday, July 31, 2012

Christmas Gift Tag Box


Today I wanted to make a Christmas project and remembered some empty body butter containers I had saved for just that.

When empty I peeled the labels and ran them through the dishwasher.

I chose this green one because it matches some of the new Christmas Designer Series paper in the New Stampin' Up! Catalog.


This paper is so pretty.


I made a rosette by taking a 12" strip of the newsprint paper and scoring with the Simply Scored scoring tool at every 1/4".


Based on the size of my container (a small body butter container from The Body Shop) I decided I wanted a 2-1/2" rosette so I cut a 1-1/4" strip from the scored piece (finished rosette will be double the width).

Then folded accordion style (mountains and valleys)


I sniped one end off to match up. This will make more sense in a minute (I hope).

Using a good adhesive - I prefer Crystal Effects.

Glue the two ends together creative a loop.


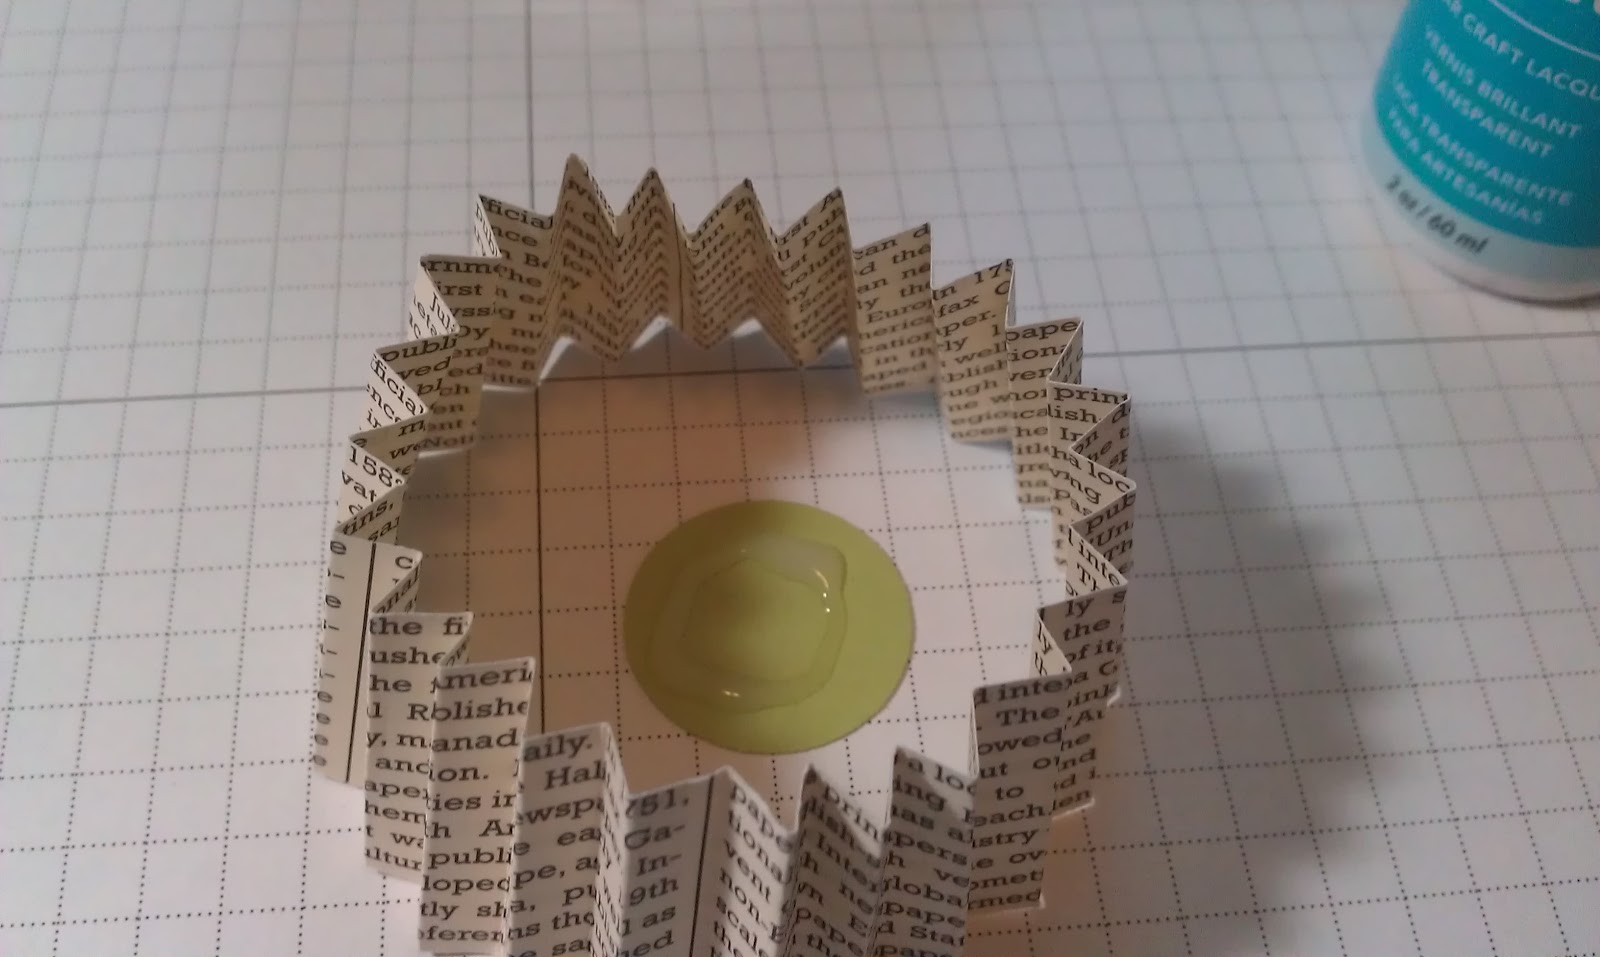
Using a circle punch or a scrap of paper smaller than the finished rosette will
as it will not show when finished.


Add adhesive to punched circle.

Place loop over circle and collapse the loop inward using both hands (I hope that makes sense - if only I had a third hand I could have taken a picture of that).


Hold rosette in center until adhesive has set.


To make the flower I punched three 1-3/4" scallop circles.


I then layered them on top of each other and pierced the center and added a brad to secure them.


Next I spritzed a little bit of water on it and crumbled up the first layer.


Then spritzed and crumbled the remaining layers one at a time.


Once dry it becomes stiff and will retain its shape.


I used the ornament punch in the Merry Minis Punch Pack to punch some leaves, then spritzed and crumble them a little to give them some dimension.

 
I layered and adhered all my layers to the lid.


Then used the new Bitty Banners Framelits to make a flag.


I snipped off one end and adhered it to the lid then added
a new Vintage Faceted Designer Button to the center. 


Finishing it off with a 1/4" strip of Designer paper around the lid.


I then used all the scraps leftover to make 25 gift tags to fill it with.


Each tag is different.


There you have it - a cute little gift for a friend or hostess.

Supplies:

First Edition Specialty Designer Series Paper #121878
Candlelight Christmas Specialty Designer Series Paper #126901
Festival of Prints Designer Series Paper Stack #126904
Real Red Card Stock #102482
Certainly Celery Card Stock #105125
Very Vanilla Card Stock #101650
Teeny Tiny Wishes Stamp Set #115370
Tiny Tags Stamp Set #118091
Petite Pairs Stamp Set #122495
1/16" Circle Handheld Punch #101227
2-3/8" Scallop Circle Punch #118874
1-3/4" Scallop Circle Punch #119854
1" Circle Punch #119868
Merry Minis Punch Pack #126882
Big Shot Die-Die Cutting Machine #113439
Bitty Banners Framelits #129267
Vintage Faceted Designer Buttons #127555
3/16" Neutrals Brads #119736 
Glue Dots #103683
Crystal Effects #101055
Simply Scored #125624
Paper-Piercing Tool #126189
Stampin' Pierce Mat #126199
Real Red Classic Stampin' Pad #126949
Certainly Celery Classic Stampin' Pad #126958
Whisper White Craft Stampin' Pad #101731
Uni-ball Signo Gel Pen #105021
Real Red Stampin' Write Marker #100052
Certainly Celery Stampin' Write Marker #105106
Stampin' Trimmer #126889
Linen Thread #104199
Empty container
Needle

Click here to purchase these and other Stampin' Up! products.


Thanks for stopping by! Please leave a comment - I'd love to hear from you.

Holly


Monday, July 30, 2012

Cabinet Door Serving Tray

A while back I purchased a bunch of cabinet doors (6 total). One of which I used to make my Cabinet Door Chalkboard  Here.

It's now time for the second edition of my cabinet door re purpose.

I decided to use a vinyl transfer I had to make a serving tray. I picked the cabinet door that would work best for this purpose - an off white one that didn't even need painting just some cleaning Making this a super easy and fast project - Score!


For this project I purchased the cabinet door for $2.00, two cabinet door handles at Home Depot for $2.78 each and a package of clear surface guard pads for 2.97. The vinyl transfer was free. Making this project come to a grand total of $10.53.


I first cleaned the door with 409 and paper towels then went over it with a magic eraser. Wow! with just a little elbow grease - what a difference!


I then used the vinyl instructions to transfer the image to my tray.


I added the rubber bumpers to the bottom.


Then measured and marked where I wanted the handles.


And drilled the holes.


Attached the handles.


And WOW It's done! Seriously it only took me thirty five minutes to put together!


I made it for a housewarming gift even though I don't know of anyone purchasing a new home right now. You can't be too prepared though - right?

Depending on who I give it to - it can be personalized by pairing it with a bottle of wine and a couple of wine glasses or kitchen towels and a plate of cookies etc.

I so love how it turned out I may just keep it for myself.

Thanks for stopping by, please leave a comment - I would love to hear from you.

Holly
 

Creative Corner Blog Hop

Thursday, July 26, 2012

Things we find Pinteresting Thursday


Monday, July 23, 2012

Creative Corner Blog Hop


Thursday, July 19, 2012

Baby needs a new pair of shoes

When I first signed up for Pinterest (Do you not just love Pinterest? I am a Pinaholic! There, I've said it! If you have not yet made the plunge - I highly recomend it!) I found a tutorial about Mod Podged shoes and immediately pinned it - one of my very first pins.

Later I came across a cheep pair of shoes I had ordered on line and was not crazy about but for the price I paid it was not worth sending them back. I remembered the tutorial I had posted and picked up a bottle of outdoor Mod Podge at JoAnn's. I set it aside with the shoes and every time I looked at them I would think about my fabric stash and try to make a decision on which fabric to cover them with.

Fast forward a couple of months - I decided on this beautiful Stampin' Up! fabric in a trendy gold and white pattern with petite navy blue dots (remembering I have a cute pair of navy blue Capri's that would look great with it) - Motivation! Luv it!

I gathered my supplies -
shoes
fabric
scissors
Mod Podge (outdoor variety)
foam brush
craft knife


I've added a few pictures of the process - To see the full tutorial click Here


I cut tabs around the inside curve - this makes it easier to fold under.


Didn't they turn out sweet? It took me less than an hour to complete this process and then I let them dry overnight - Seriously! it was pretty quick.

I wore them today to the Stampin' Up! convention and they held up great. I Now have to find some more cheep shoes to transform. Just think - You could add jewels, pearls, lace, trim, buttons, tassels - The posibilities are endless. And did I mention that when you get tired of them you can re-do them.


 The Stampin' Up! fabric I used is  #126894 Comfort Cafe - includes 3 extra-wide fat quarters (37" x 18")  in 3 coordinated designs (One of which I used Here for my Knot-so-hard flip flops) can be purchased along with other Stampin' Up! products Here.


 I've now completed approximately 10-12 of the projects I've found on Pinterest - I've been so inspired and I'm pretty sure it's still cheeper than therapy.


Thanks for stopping by! Please leave a comment, I would love to hear from you.

Holly


Related Posts Plugin for WordPress, Blogger...